How to assign, manage, and resolve tasks in the Raptor App (desktop)
This guide will walkthrough how you can create, track, manage, and resolve tasks from the Digital Twin.
Article sections:
Task List Creation
-
Log into app.raptormaps.com
-
Before assigning tasks, ensure appropriate user permissions are set.
To create a Task List, a user needs the 'Manage Work Orders' permission enabled (Technicians being assigned Task Lists will need the 'Complete Work Orders' permission enabled.) -
Filter the anomaly-type you want to create a task list for by selecting the target icon (blue circle).
-
Filter multiple anomaly-types by opening the filter settings (red circle).

-
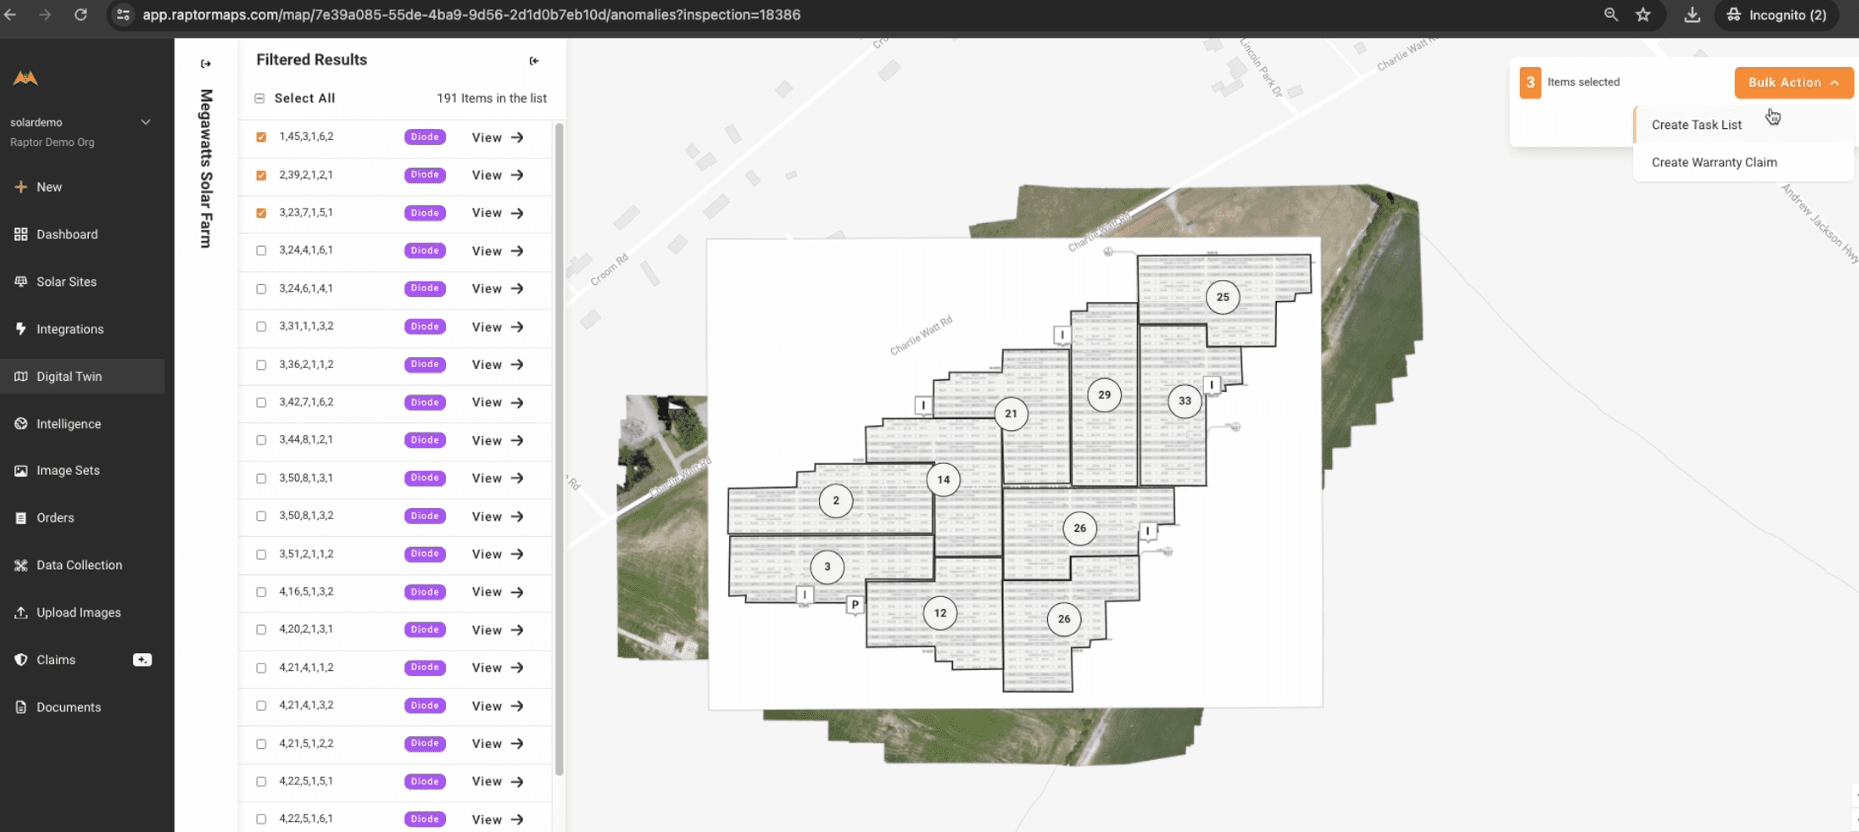
From the filter list, select which anomalies are to be added to the task list, or Select All. Then, select Create Task List from the Bulk Actions dropdown

- Follow the prompts to complete the Task List Details. The user will be able to review a summary before selecting Create Task List.

Reviewing Task Progress
To view the current progress of a Task List, navigate to site you wish to view from the Solar Sites menu, and select Tasks from the navigation bar. There you'll find the respective site's task lists.

The tasks and their statuses will be listed. In order to update or delete an individual task, select the kebab menu on the far right.

From there, you can update the task owner, action, status, or add notes and/or attachments.

You can also bulk update tasks. Select all tasks, or multiple tasks via the check boxes to the left of each task. Then click on "Select Bulk Action" and select "Update Tasks".

From there, you can update the task owner, action, or status for multiple tasks at a time.
