Article Table of Contents:
-
App Icon Glossary
-
Switching Between Inspections
-
App Localization
-
View/Edit Anomalies
-
View/Edit Tasks
-
View/Edit Equipment Information
App Icon Glossary
This article frequently refers to the following app icons:
Description |
Icon |
|
Arrow icon: This icon located in the bottom left corner of the app will jump to your location. See more details in the App Localization section. |

|
|
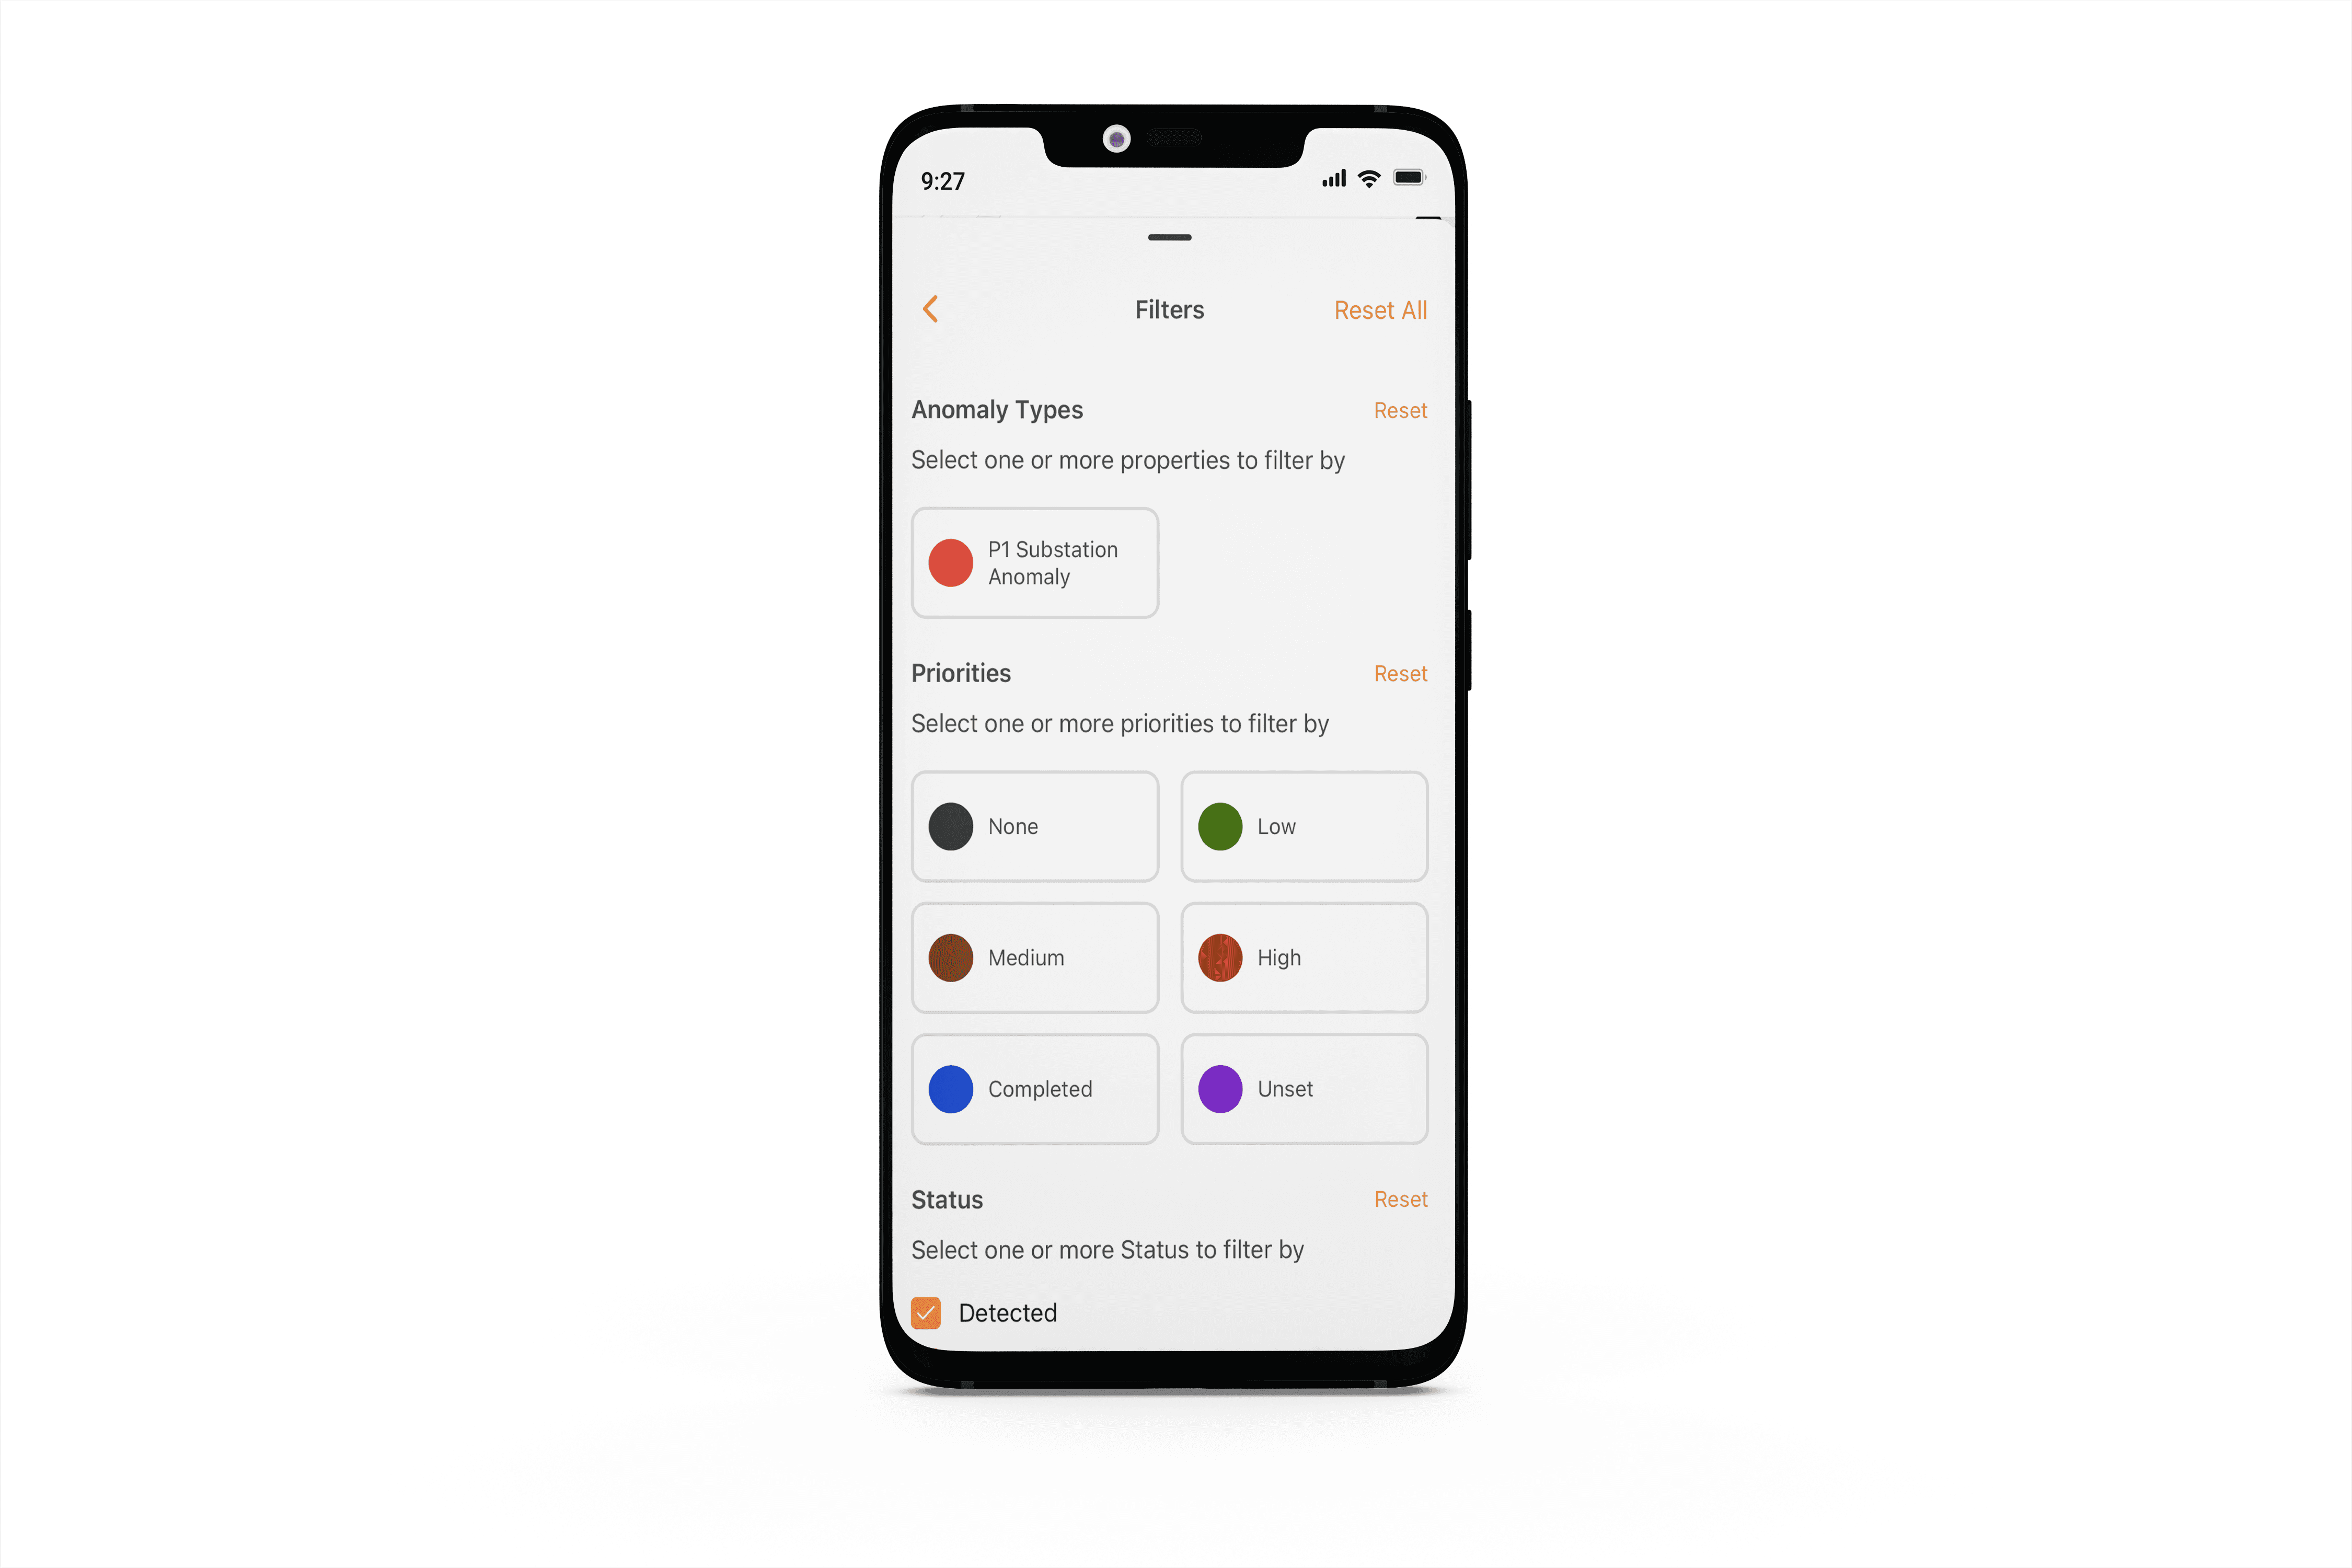
Filter icon: This icon located in the top right corner of the app will access the filter module for corresponding data layers. |
 |
|
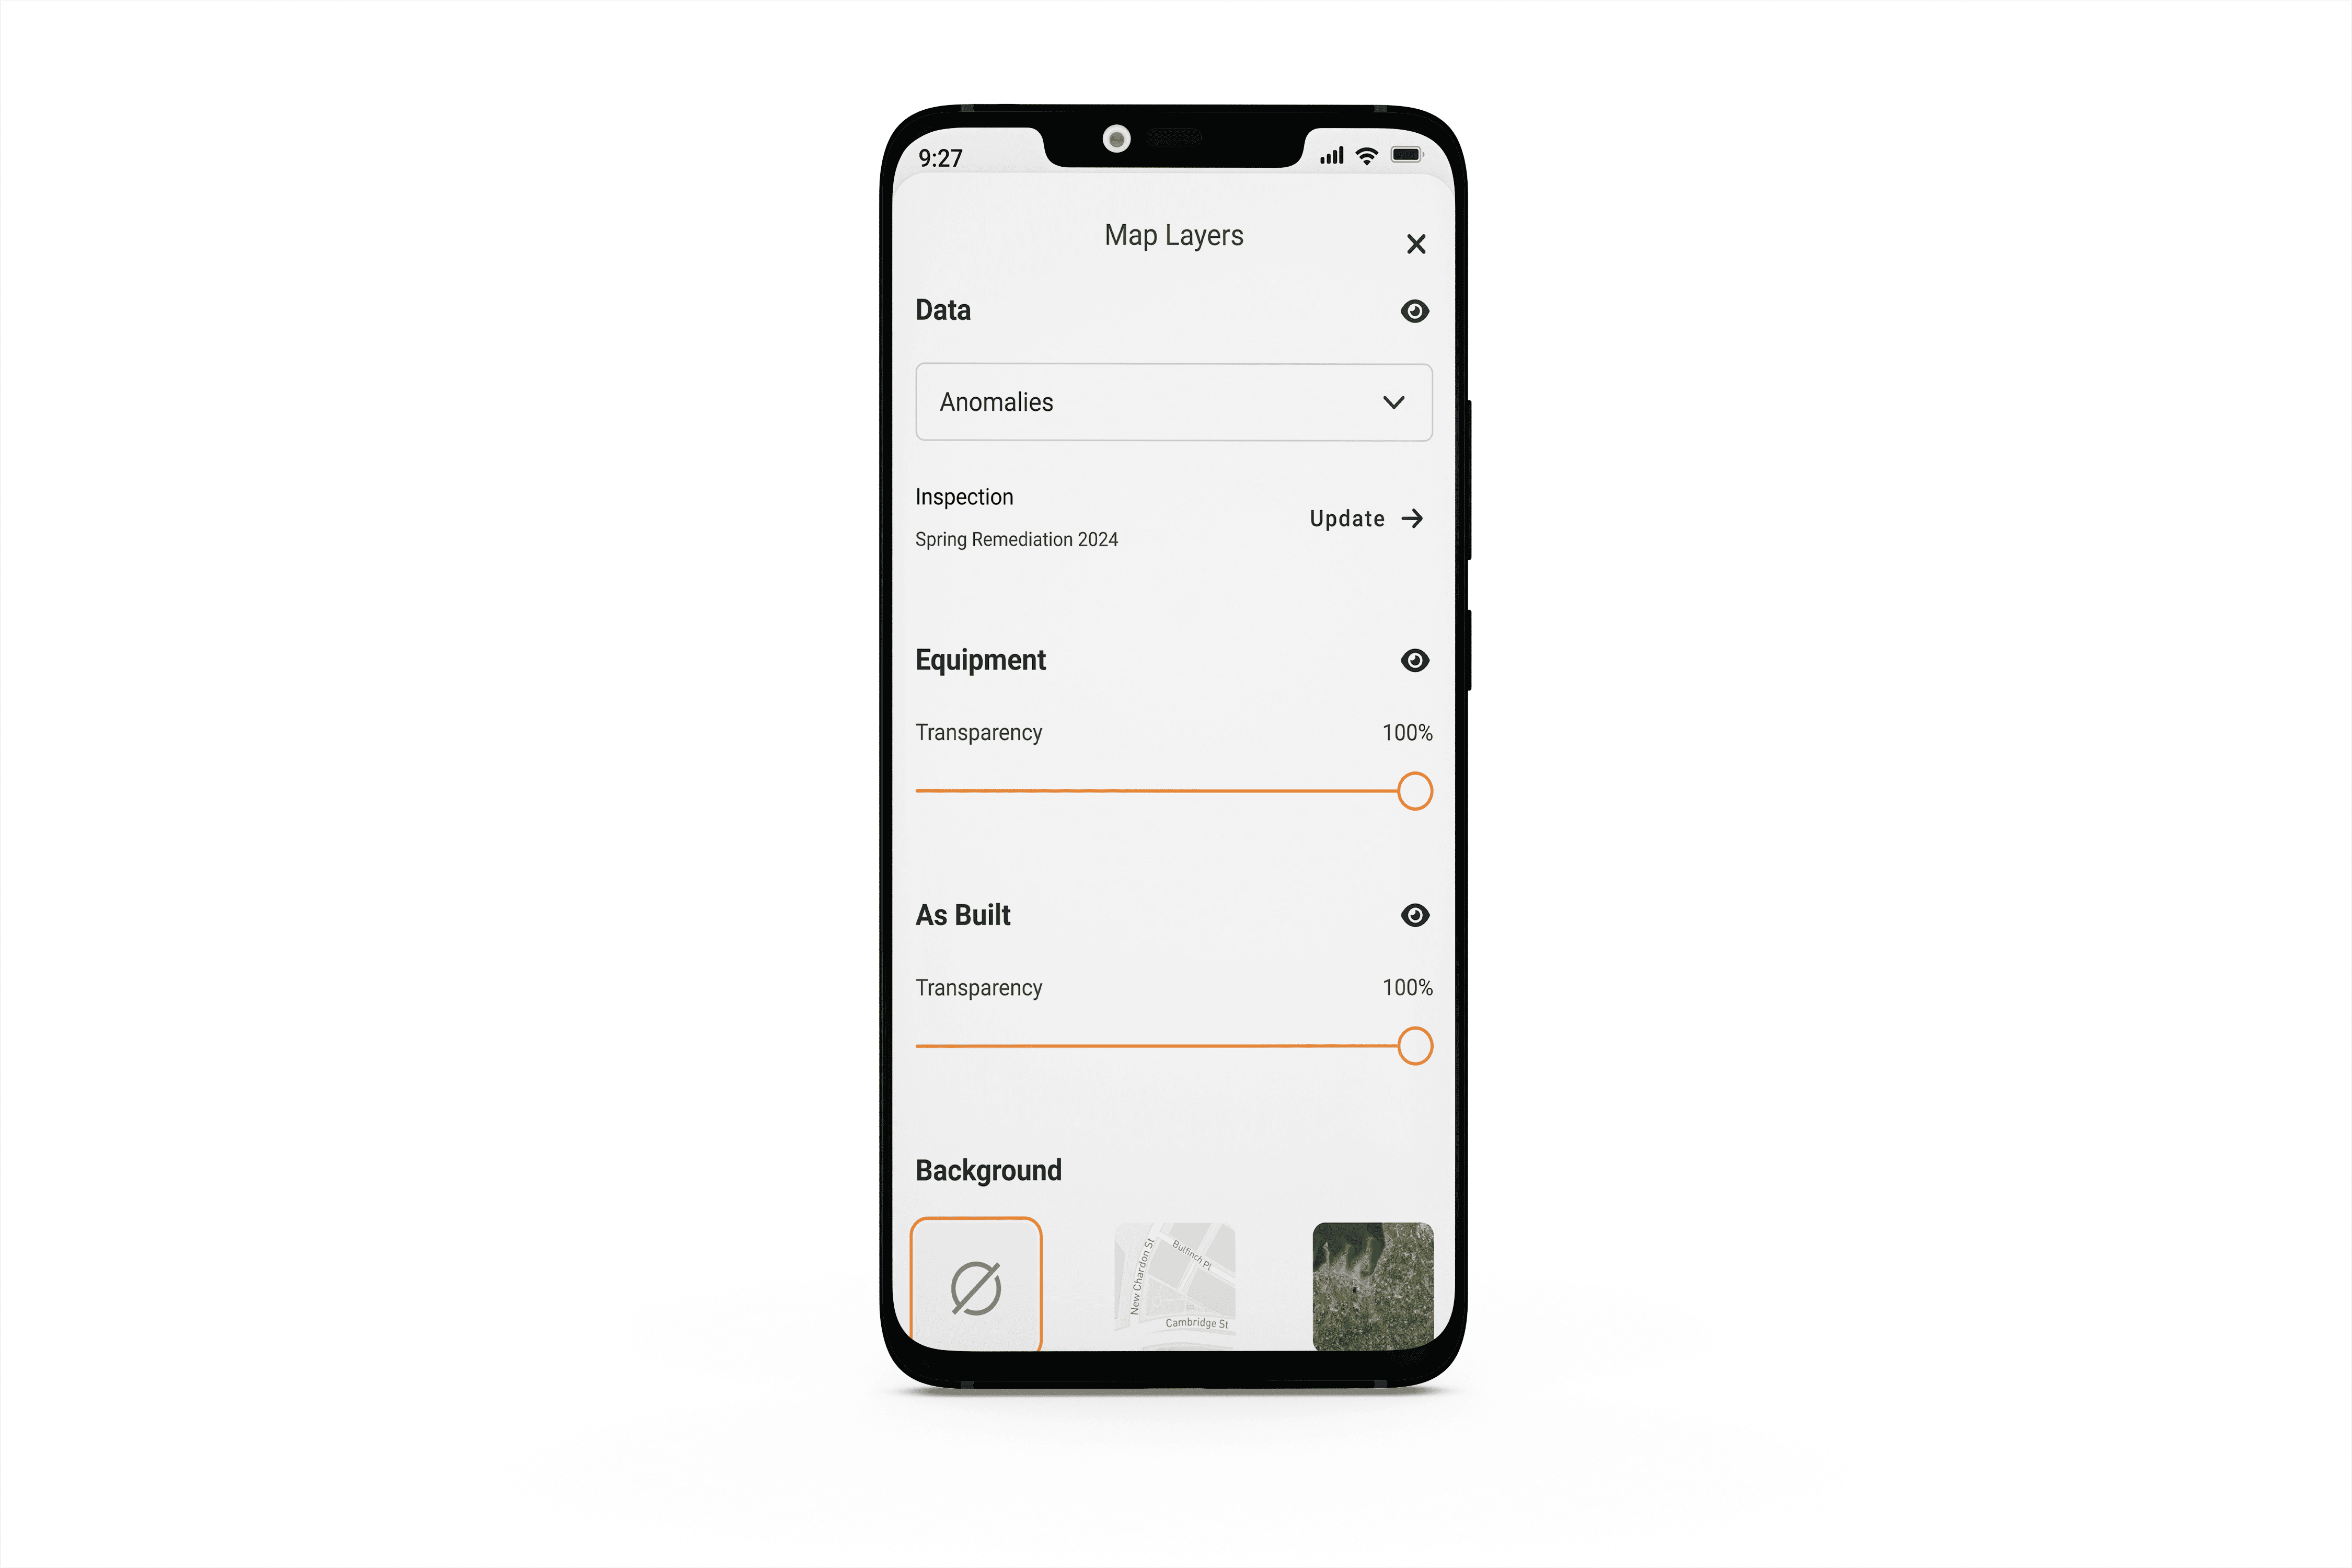
Paper Stack Icon: This icon located in the bottom left corner of the app will open the map layer settings. |

|
Switching Inspections
When you first open your map, it will automatically default to showing the most recent Inspection.
-
Open Map Layer Settings by clicking the Paper Stack icon in the bottom left corner of the screen
-
Tap “Update” next to Inspection source
-
Select the desired inspection
App Localization
To center the map on your location, tap the Arrow icon in the bottom left hand corner of the screen. For this feature to work, you will need to allow Raptor Solar to use your location While Using App.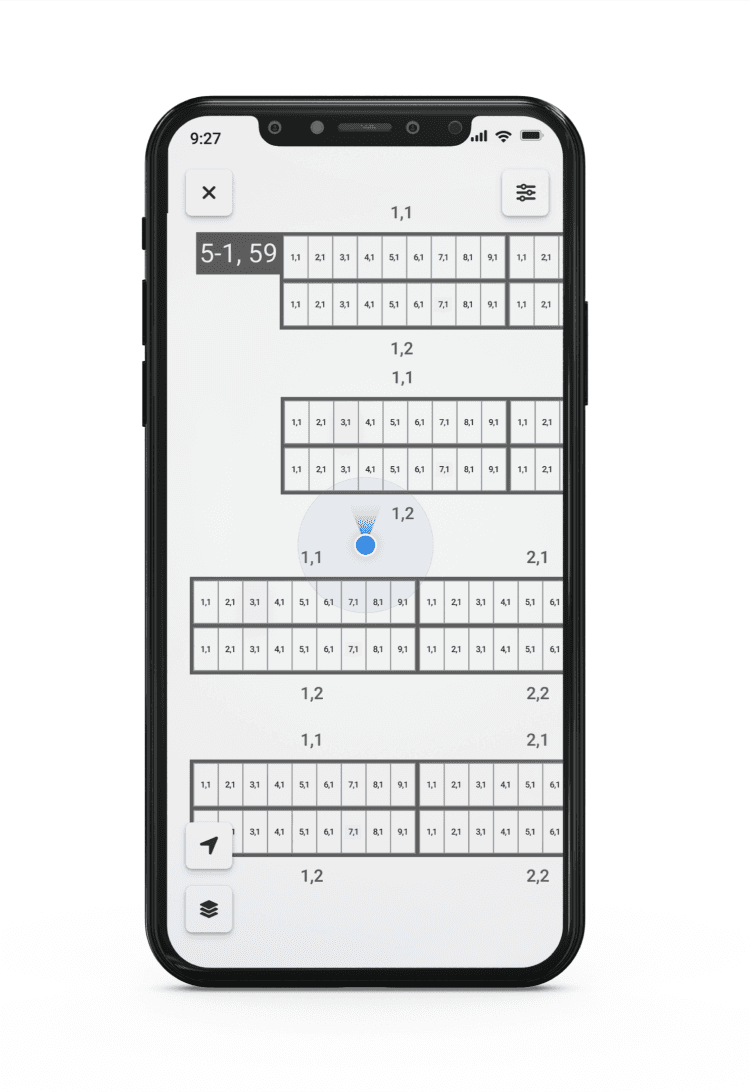
To center the site on the map, open the Map Layer settings by clicking the Paper icon in the bottom left hand corner of the screen and then Recenter Site.

Anomalies
To filter the anomalies you want to view:
-
Tap the Filter icon in the top right corner of the screen
-
Filter Anomaly fields by Type, Priority and Status.
Editing Anomalies:
-
Pinch to zoom on the Digital Twin map
-
Tap on an Anomaly in the map
-
Edit any field marked with a Pencil icon
-
Select the new input
-
You will see a message indicating the the field has been updated successfully
-

Tasks
View Tasks
-
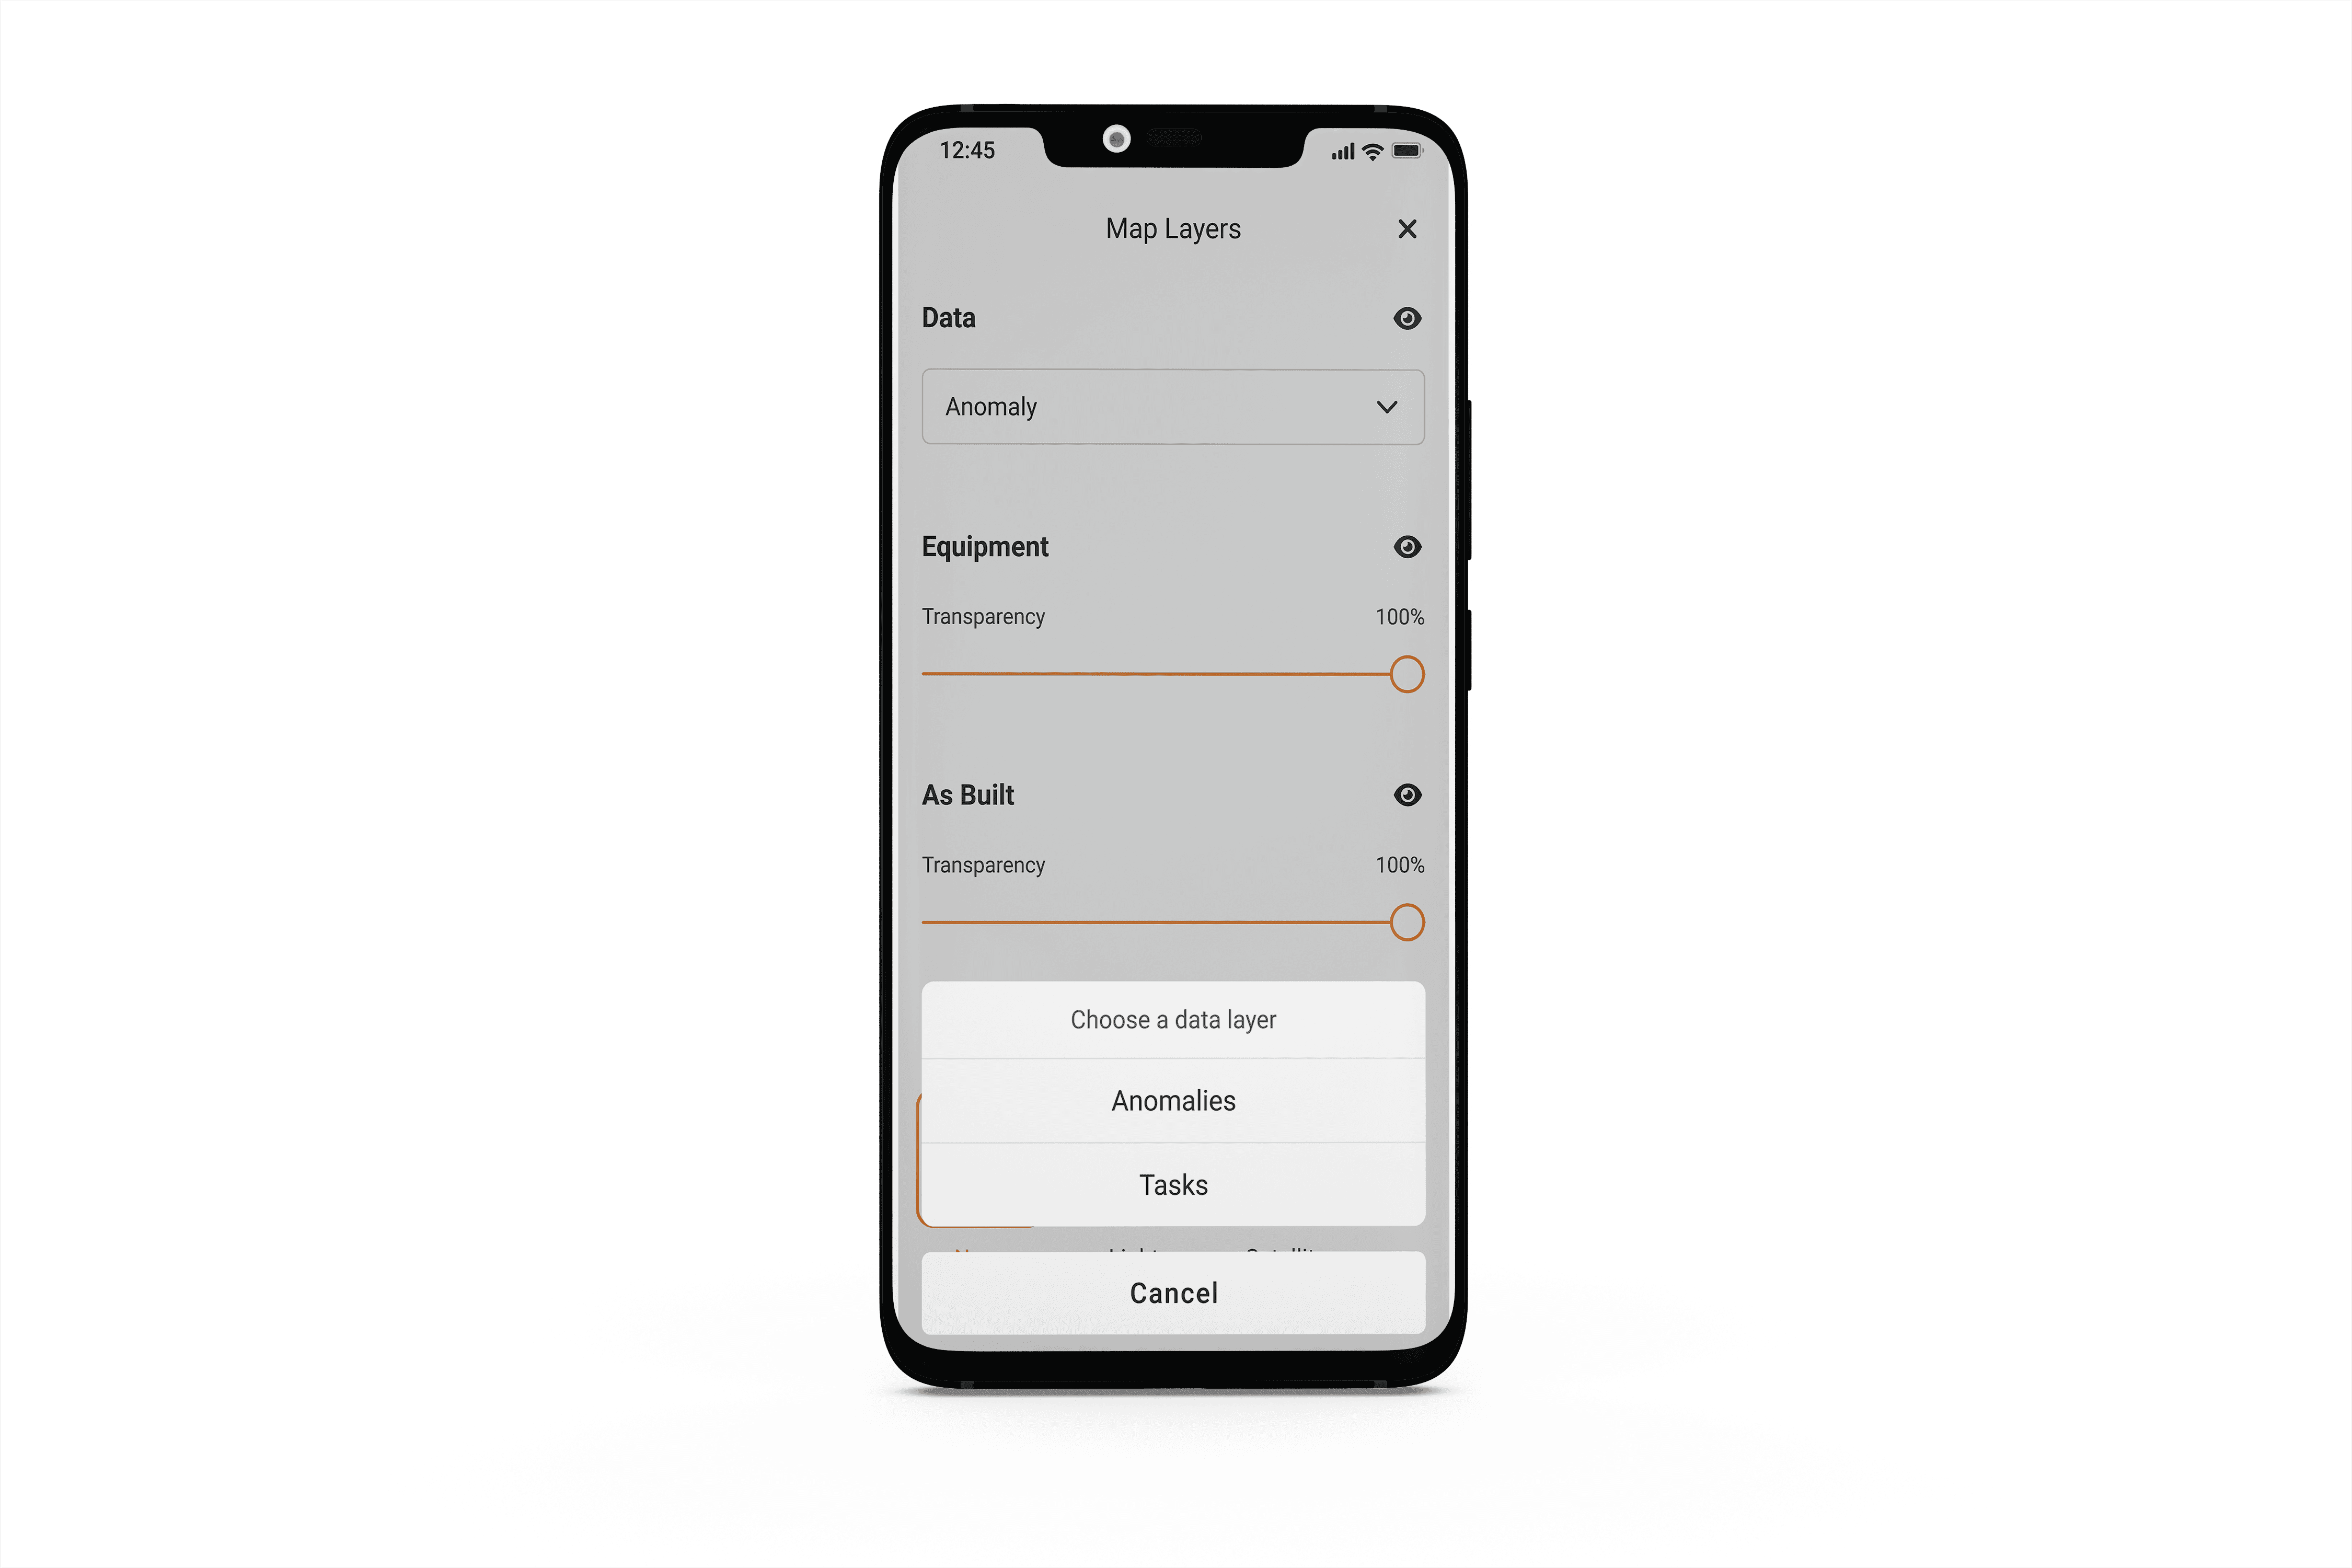
Open Map Layer Settings by clicking the Paper Stack icon in the bottom left corner of the screen
-
In the Data dropdown, select Tasks
- Swipe down or select the X to view and select tasks on the map
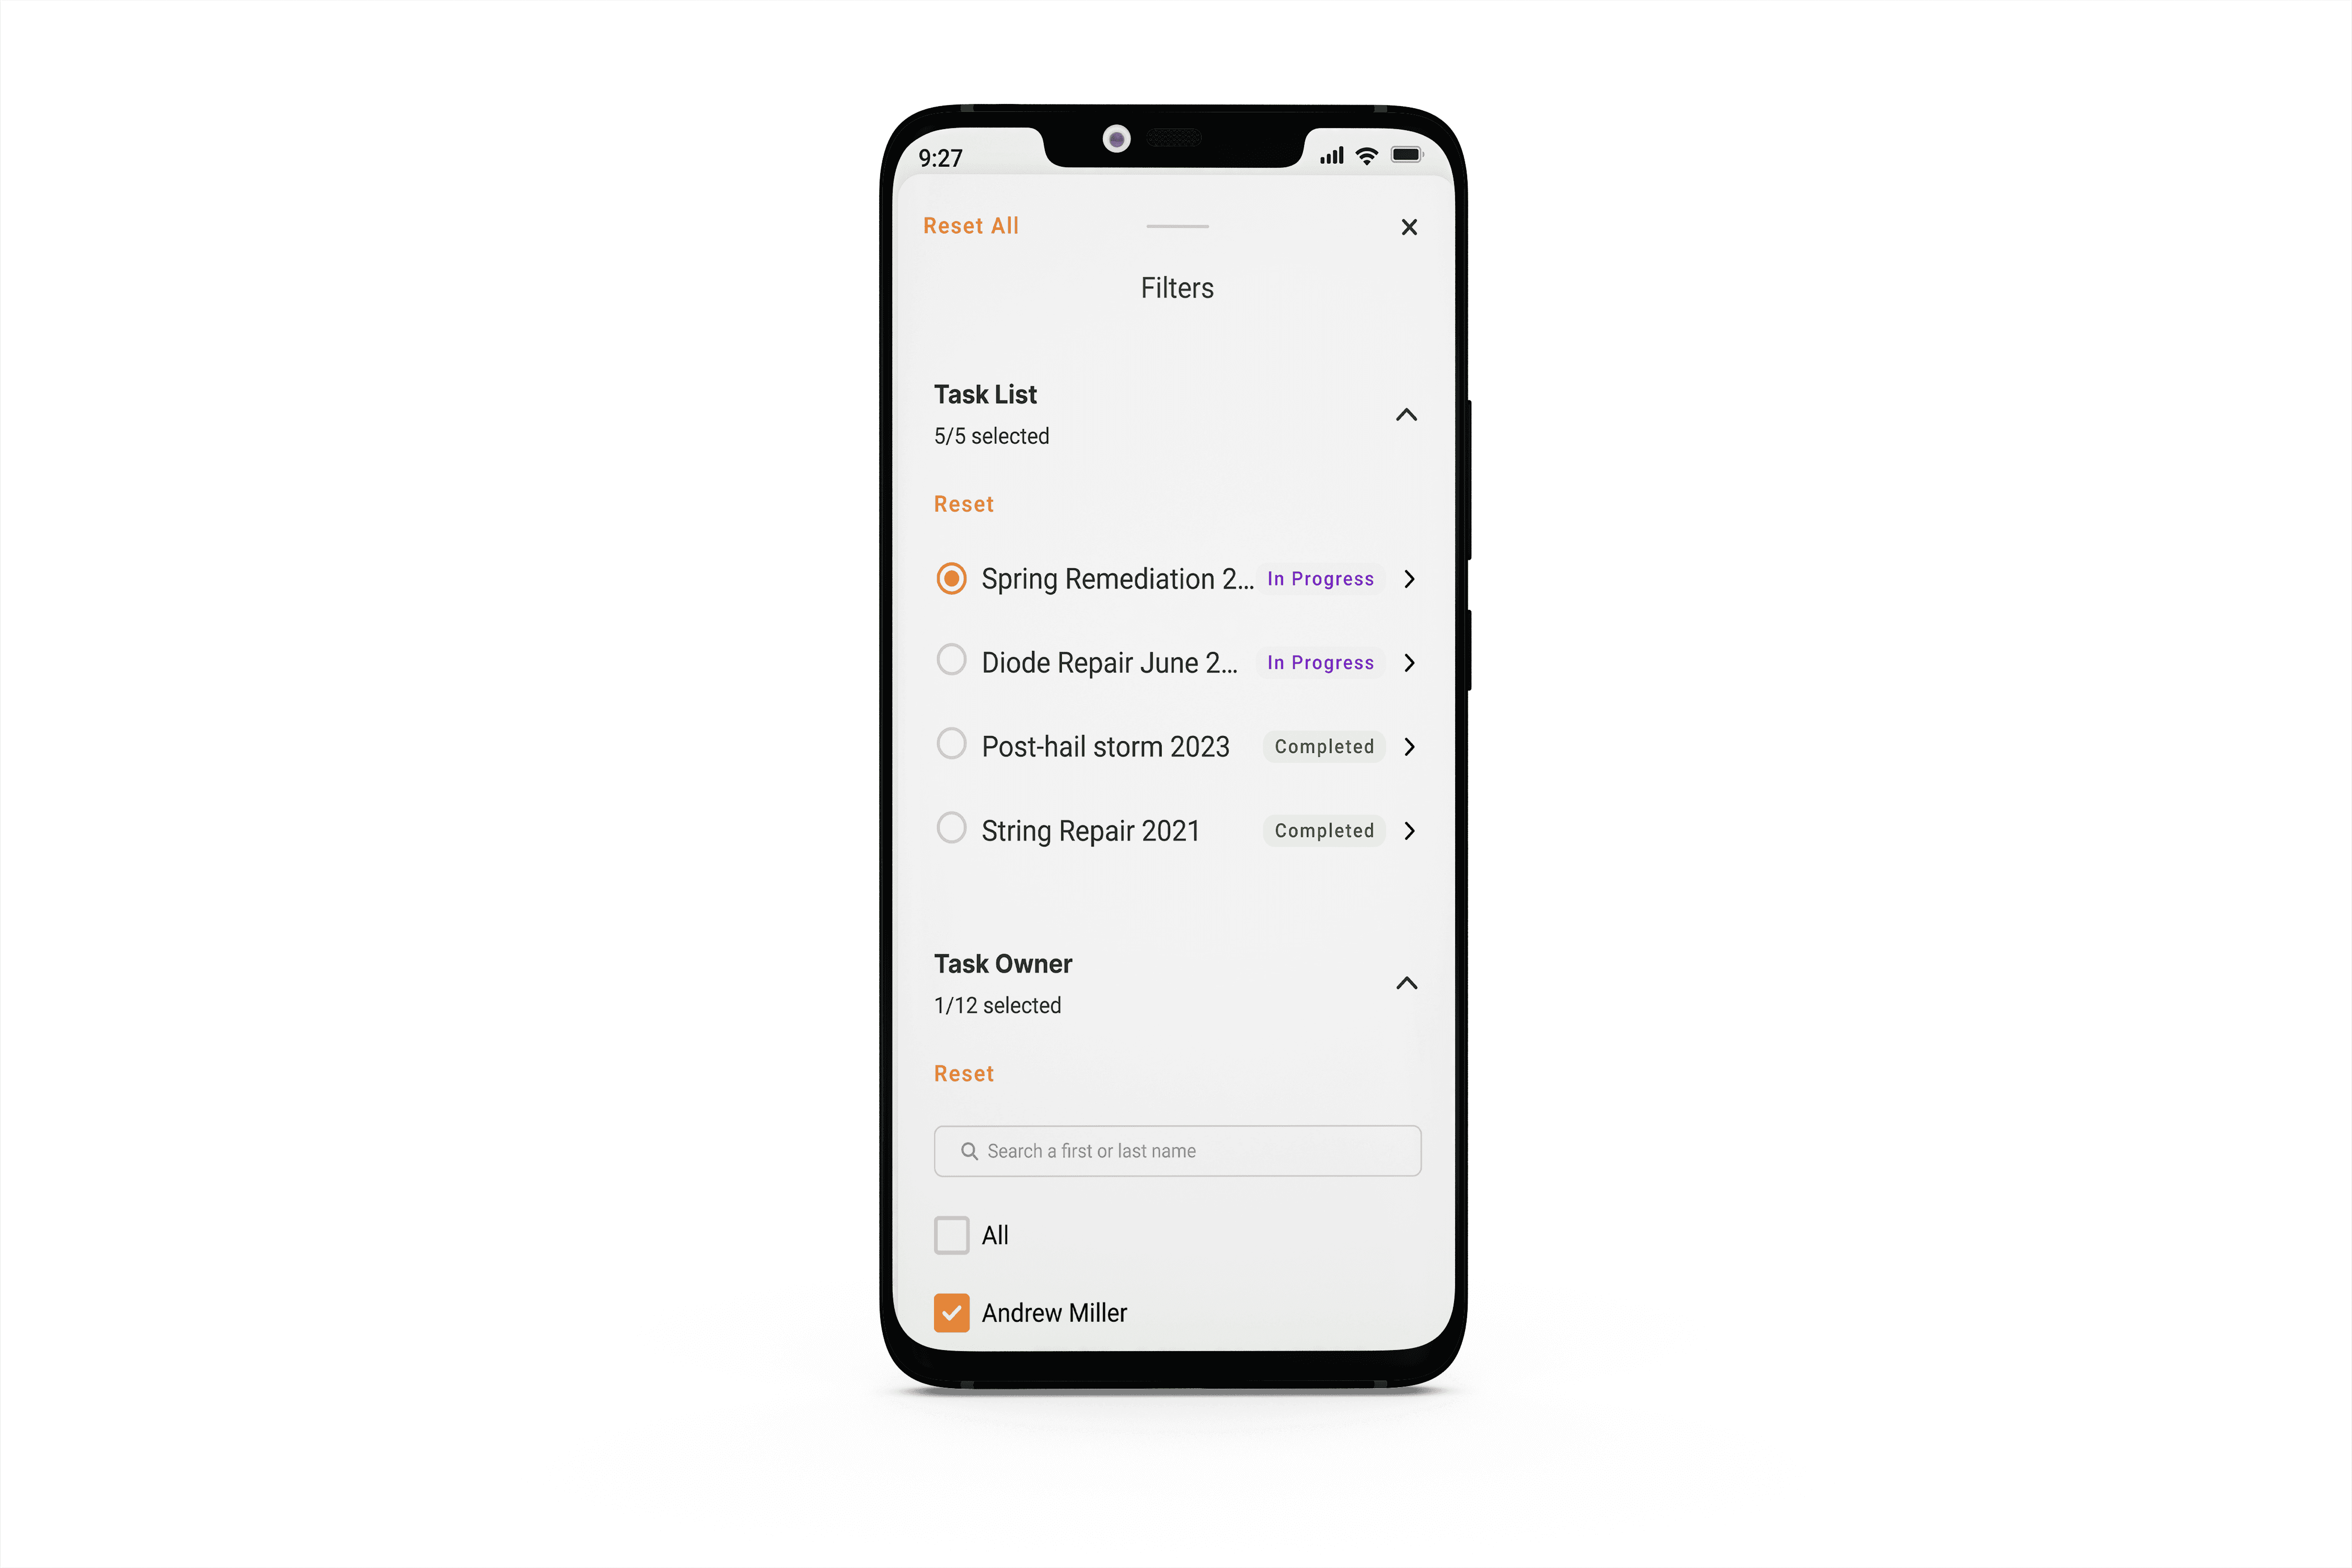
To filter Tasks
-
Click the Filter icon in the top right corner of the screen
-
Select which Task List you want to view and filter by a variety of different Task fields including Owner, Priority and Status.
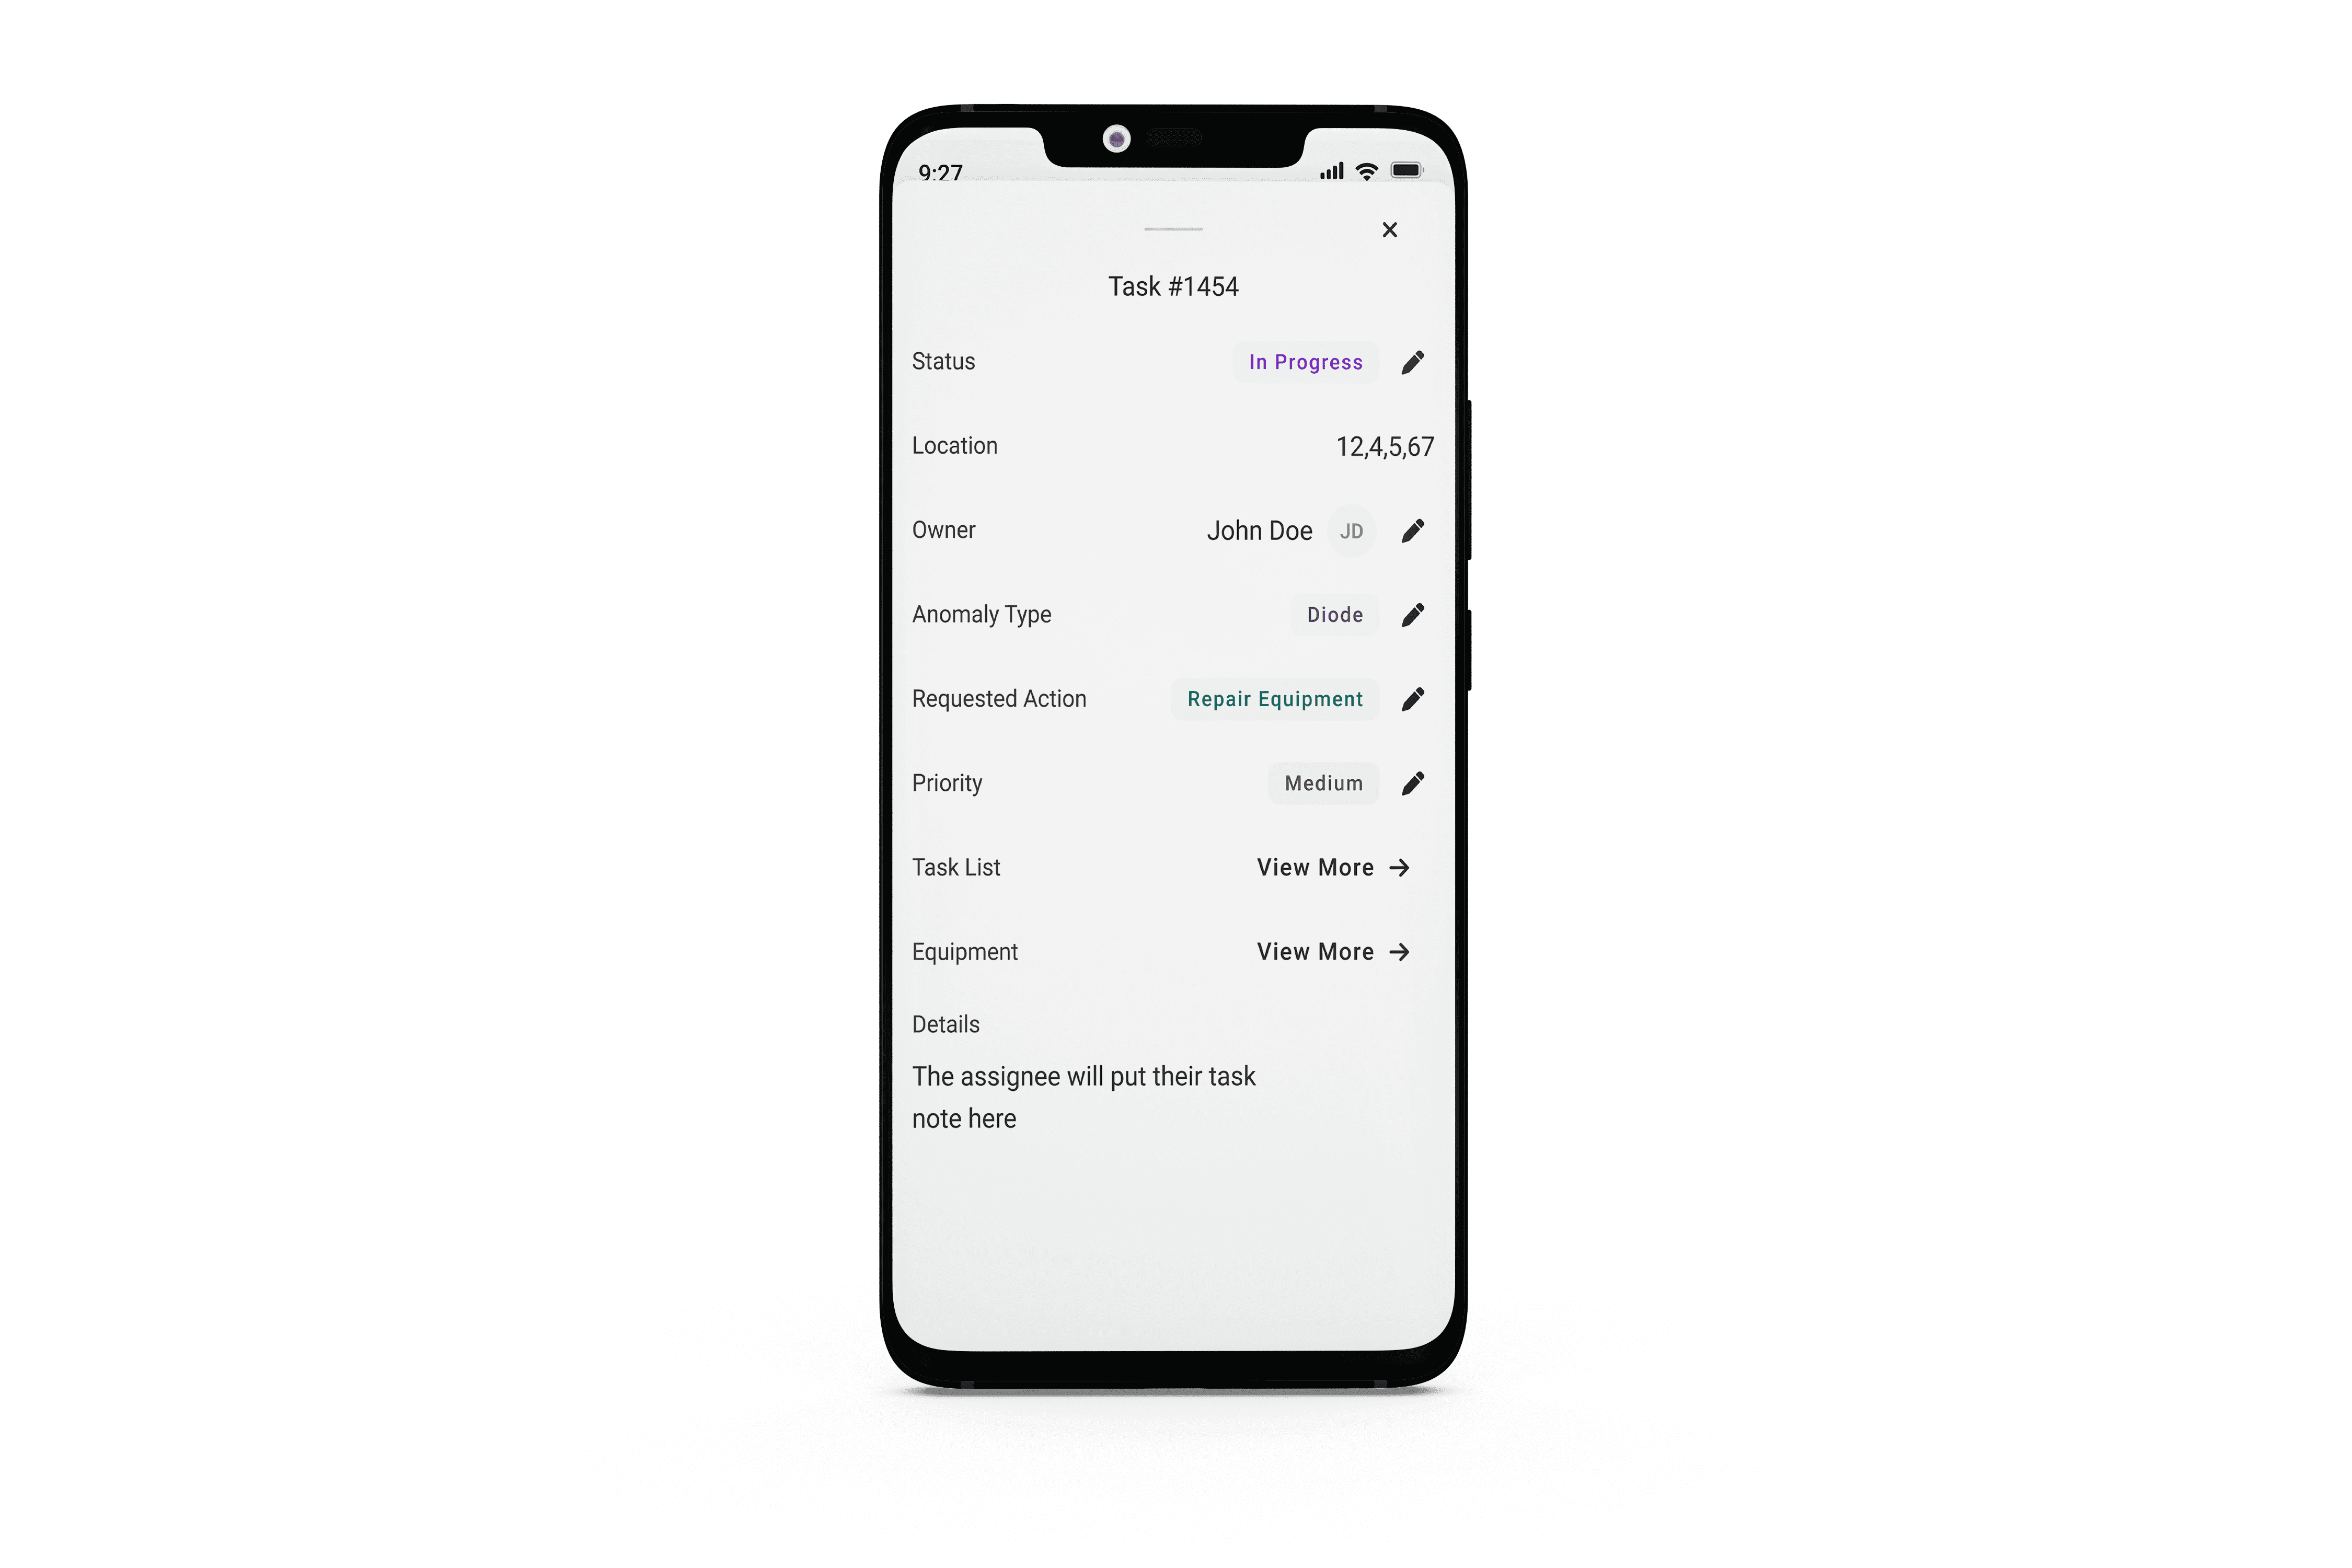
To edit Tasks
-
Tap on a Task in the map view or from the Task List
-
Edit any field marked with a Pencil icon
-
Click the field you would like to update
-
Select the new input
-
You will see a message indicating the the field has been updated successfully
-
Note that when offline, if you download the Task List you will still be able to edit and update Tasks which will sync to the cloud once you have signal.
Equipment Information
Users can update serial numbers directly in the 'Equipment' data layer, one module at a time.
Select the module you would click the pencil icon next to the serial number, and enter or scan the number.
- Open the map within the Digital Twin, and select the data layer icon in the bottom left:

- Select the equipment layer:

- Choose the module on the map by tapping on it, and tap the dropdown arrow next to Serial Number. Then, select the pencil icon:

- Finally, select update and the serial number will save for that module:

Note: Users will need the "Edit" permission enabled if they have site level access; for users with full portfolio access, they will need the "Edit All Solar Reports" permission enabled to add Equipment Notes. Org admins can manage permissions by following this guide.
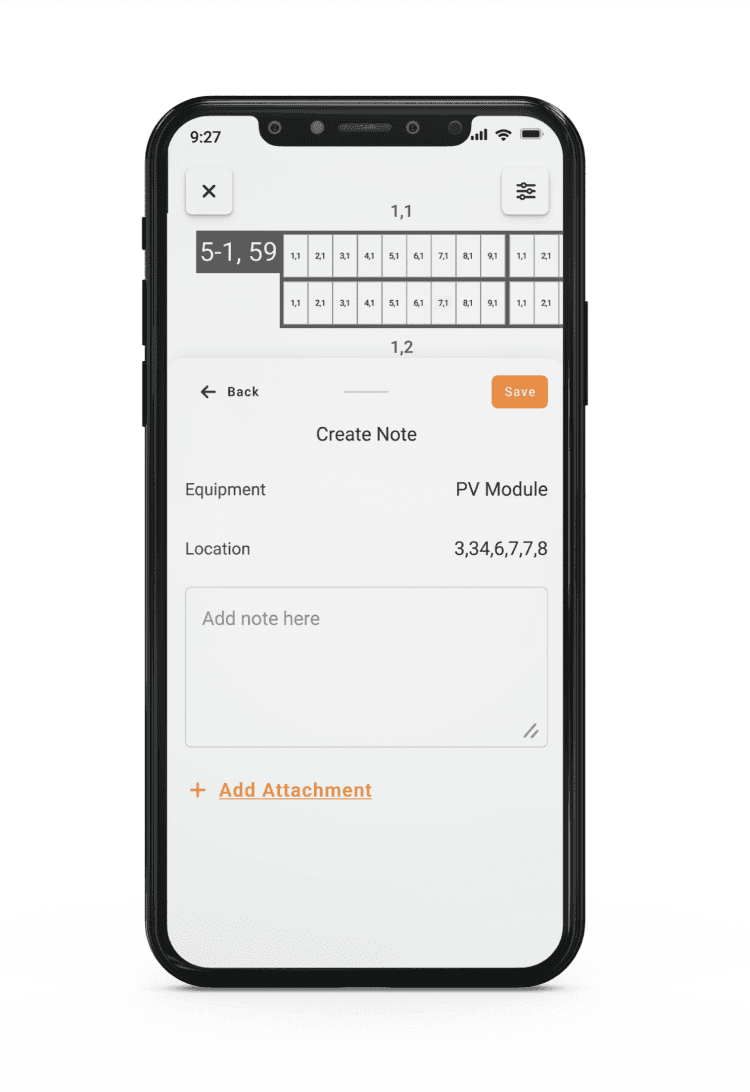
Equipment Notes provide a way for you to store notes, documents and photos attached to a geo-spatial location. After you select your site from the Sites menu, you will be able to start recording site-specific notes.
To add Equipment notes:
-
Select your site
-
Open the map
- Navigate to the Equipment Data Layer
-
Select the module you want to make a note for
-
Select Create Note
-
Add text, photo(s), or both
-
Select Save
This note can now be seen as part of the Activity Feed for that equipment. Anyone who views the equipment, on web or mobile will be able to reference the Note and its contents.
If you are working in an area with little to no signal, download the site map to capture notes which will sync to the cloud once you return to cell network or WiFi.